Monday, December 12, 2022

Island Batik Ambassador's Lone Star Blog Hop

This month the Island Batik Ambassadors were challenged to make a Lone Star quilt.  I remember making a miniature Lone Star quilt when I was in middle school (I had no idea they were hard LOL), but I've never made a big one.  

The first thing I did was head over to Accuquilt's website to see what dies they had I could use to make a Lone Star.  I chose the Carpenter's Wheel die as the diamond was larger than the Prairie Star die which finish at just 1 inch.  

I then started to think about what I could put in the corners that would be interesting and different.  I looked at a bunch of pictures online and I love the ones with complicated applique, but I didn't want to do a bunch of applique.  Then I started looking at other Accuquilt Block on Board dies and came upon the Pickle Dish Die which is one of my favorites.  It makes the quilt look like it has a circle around it!
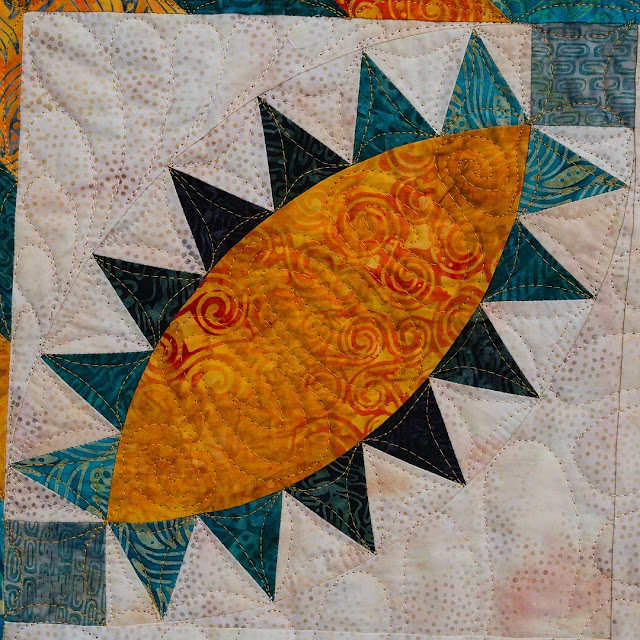

For this quilt I received the Copperfield collection by Claudia Pfeil.  It's a gorgeous collection of cheddars, oranges, and teals.  


When I picked out the colors for my Pickle Dish blocks I decided I wanted the outside points to gradate in color.  I complemented this with an orange swirl fabric which provides lots of contrast.


I wanted to make sure to get a nice arrangement of fabrics so I started laying them out to see what would happen.


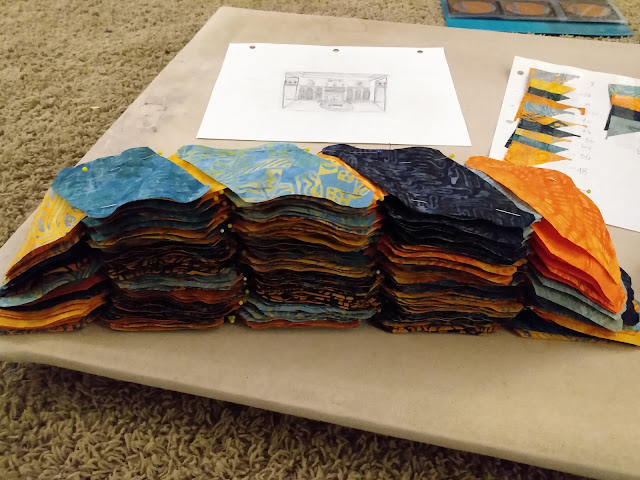
Once I had the row colors figured out I started pinning them together.  I discovered that pinning 8 diamonds together created a sort of twisted snake as shown below.  However, this became and advantage.  My Schmetz Microtex needles make sewing through batik a breeze!


I realized that I could sew down the right side and then the left side making the stitching more quickly!  It worked slick.


One of the most challenging parts of constructing a Lone Star Quilt is making the intersections of all those points come together where they're supposed to.  Using an Accuquilt die to cut the diamonds definitely helped, but how to get the rows assembled nicely?  I took my ruler and laid it along the bottom of the row and marked a line at 1/4" on each of the intersections.  


Here you can see my pink markings where I used a pin to align the rows (left) and then put in double pins to hold it securely (right).


With eight diamonds and 8 rows in each diamond there was a lot of stitching going on.  My son's drawing happens to be on my ironing surface in this picture.


Finally laying out the 8 big diamonds!  Now to add in the squares and triangles around the edge.  This means y-seams.  Y-seams and I do not have a good history.  I am not terribly good at them.  I was lamenting this to my mom, a fellow quilter, and she gave me the best piece of advice.  Mark a dot 1/4 inch from the edge where you need to stop stitching.  Once you get the needle in that dot backstitch about 1/2 inch so that the stitches can't come out.  GENIUS.  It worked like a charm and I have definitely improved my relationship with y-seams.

I decided to quilt my entire quilt in orange Aurifil thread and my favorite Hobbs 80/20 cotton/poly batting.  I like that you can see it on the darker fabrics.  For the background I used a cream.


All done!  So fun and it totally looks southwest doesn't it?  

Island Batik is giving away two fat quarter bundles this week!  Click on the Rafflecopter link to enter the contest!  a Rafflecopter giveaway

I hope you get to quilt today!

Suzy

Be sure to check out all the other amazing Lone Star quilts from my fellow Ambassadors!

WEEK 1

December 5

Maryellen McAuliffe, Mary Mack Made Mine

Gail Sheppard, Quilting Gail

December 6

Megan Best, Bestquilter

Brenda Alburl, Songbird Designs

December 7

Preeti Harris, Sew Preeti Quilts

Emily Leachman, The Darling Dogwood

December 8

Jennifer Thomas, Curlicue Creations

December 9

Blog Hop Round-Up Week 1 and Giveaway

WEEK 2

December 12

Reed Johnson, Blue Bear Quilts

Suzy Webster, Websterquilt

December 13

Gail Renna, Quilt Haven Threads

Jennifer Fulton, Inquiring Quilter

December 14

Denise Looney, For the Love of Geese

Claudia Porter, Create with Claudia

December 15

Leah Malasky, Quilted Delights

Andi Stanfield, True Blue Quilts

December 16

Blog Hop Round-Up Week 2 and Giveaway

WEEK 3

December 19

Mania Hatziioannidi, Mania for Quilts

Michelle Roberts, Creative Blonde Gifts

December 20

Pamela Boatright, Pamela Quilts

Connie Kauffman, Kauffman Designs

Sandra Starley, Textile Time Travels

December 21

Jane Hauprich, Stitch by Stitch Custom Quilting

Lisa Pickering, Lisa’s Quilting Passion

December 22

Brianna Roberts, Sew Cute and Quirky

Anorina Morris, Samelia’s Mum

Elizabeth DeCroos, Epida Studio

Thursday, December 8, 2022

100 Days of Scrappy Patchwork Day 5

Here is block 5!  Life has been full of business and sickness around here, but I'm back at it.  To refresh, I'm using my Island Batik scraps and my Accuquilt 5" Qube to make lots of blocks.

I love this red outline and purple points.  


I decided to go with very contrasting fabrics on the inside of the red frame to help add interest.


Last was the tiny purple triangles to tie the inside to the outside of the block.


All sewn.  I love the tiny purple triangles.

I hope  you get to quilt today!

Suzy

Sunday, November 27, 2022

Island Batik Ambassador's Creative Christmas Stockings Challenge

This month the Island Batik Ambassadors were challenge to make Christmas Stockings.  I recently received the Accuquilt Stocking Die and I knew it would be perfect to help me make my stocking.


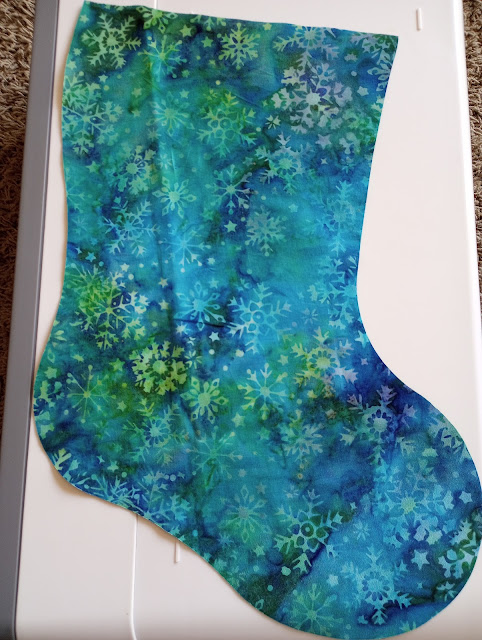
When I was digging through my fabrics I found this pretty green and blue snowflake fabric.  It's not a traditional Christmas fabric, but I knew my snowmen would sparkle on it.


I decided to put snowmen on my quilt using the Accuquilt 2", 3" and 5" circle dies as well as the Holiday Accessory die.  


I then applied fusible to the back of some cream fabric as well as scraps I picked out for the accessories.  Finding just the right fabric for the carrot nose was fun.


I then applied the applique pieces and fused them in place.

I have a great love for rick rack.  It's such fun to use and provides a pop of additional color and texture.  I decided to carefully sew a piece into the stocking seam to add a little extra zip.  I'm glad I took the time because I love how it turned out!


To secure my snowmen I stitched about 1/16 inch away from the edges using a navy blue Aurifil thread.  I chose navy instead of black because I thought it was be a less stark contrast with the background fabric.  I also added eyes and mouth with a Pigma pen.


I also added a small loop of rick rack to the top of the seam to use as a hanger for the stocking.


All done!  Now to decide who to give it to so I can add a name.


I hope you get to quilt today!
Suzy

Friday, November 18, 2022

100 Days of Scrappy Patchwork Day 4

This block feels like its exploding out from the center to me.  Like a firework.  It's made from my beautiful Island Batik scraps that I cut using my 5" Qube from Accuquilt.


Here is how I started the design.


Complete!


I hope you get to quilt today!
Suzy


Friday, November 11, 2022

100 Days of Scrappy Patchwork Day 3

The first two blocks I made using my Island Batik scraps and my Accuquilt 5" Qube was a 3 unit by 3 unit block like a nine-patch.  For this block I wanted to explore what happened when I used those long skinny triangles to make sort of an outer frame.


Here's where I started off.


The dark gray here is a solid fabric.  It is still from Island Batik and great to work with.  It's fun to sprinkle it into these blocks.


I decided to add pink accent triangles to make your eye zoom around the block.


All done!

I hope you get to quilt today!

Suzy